Mesh Splitter
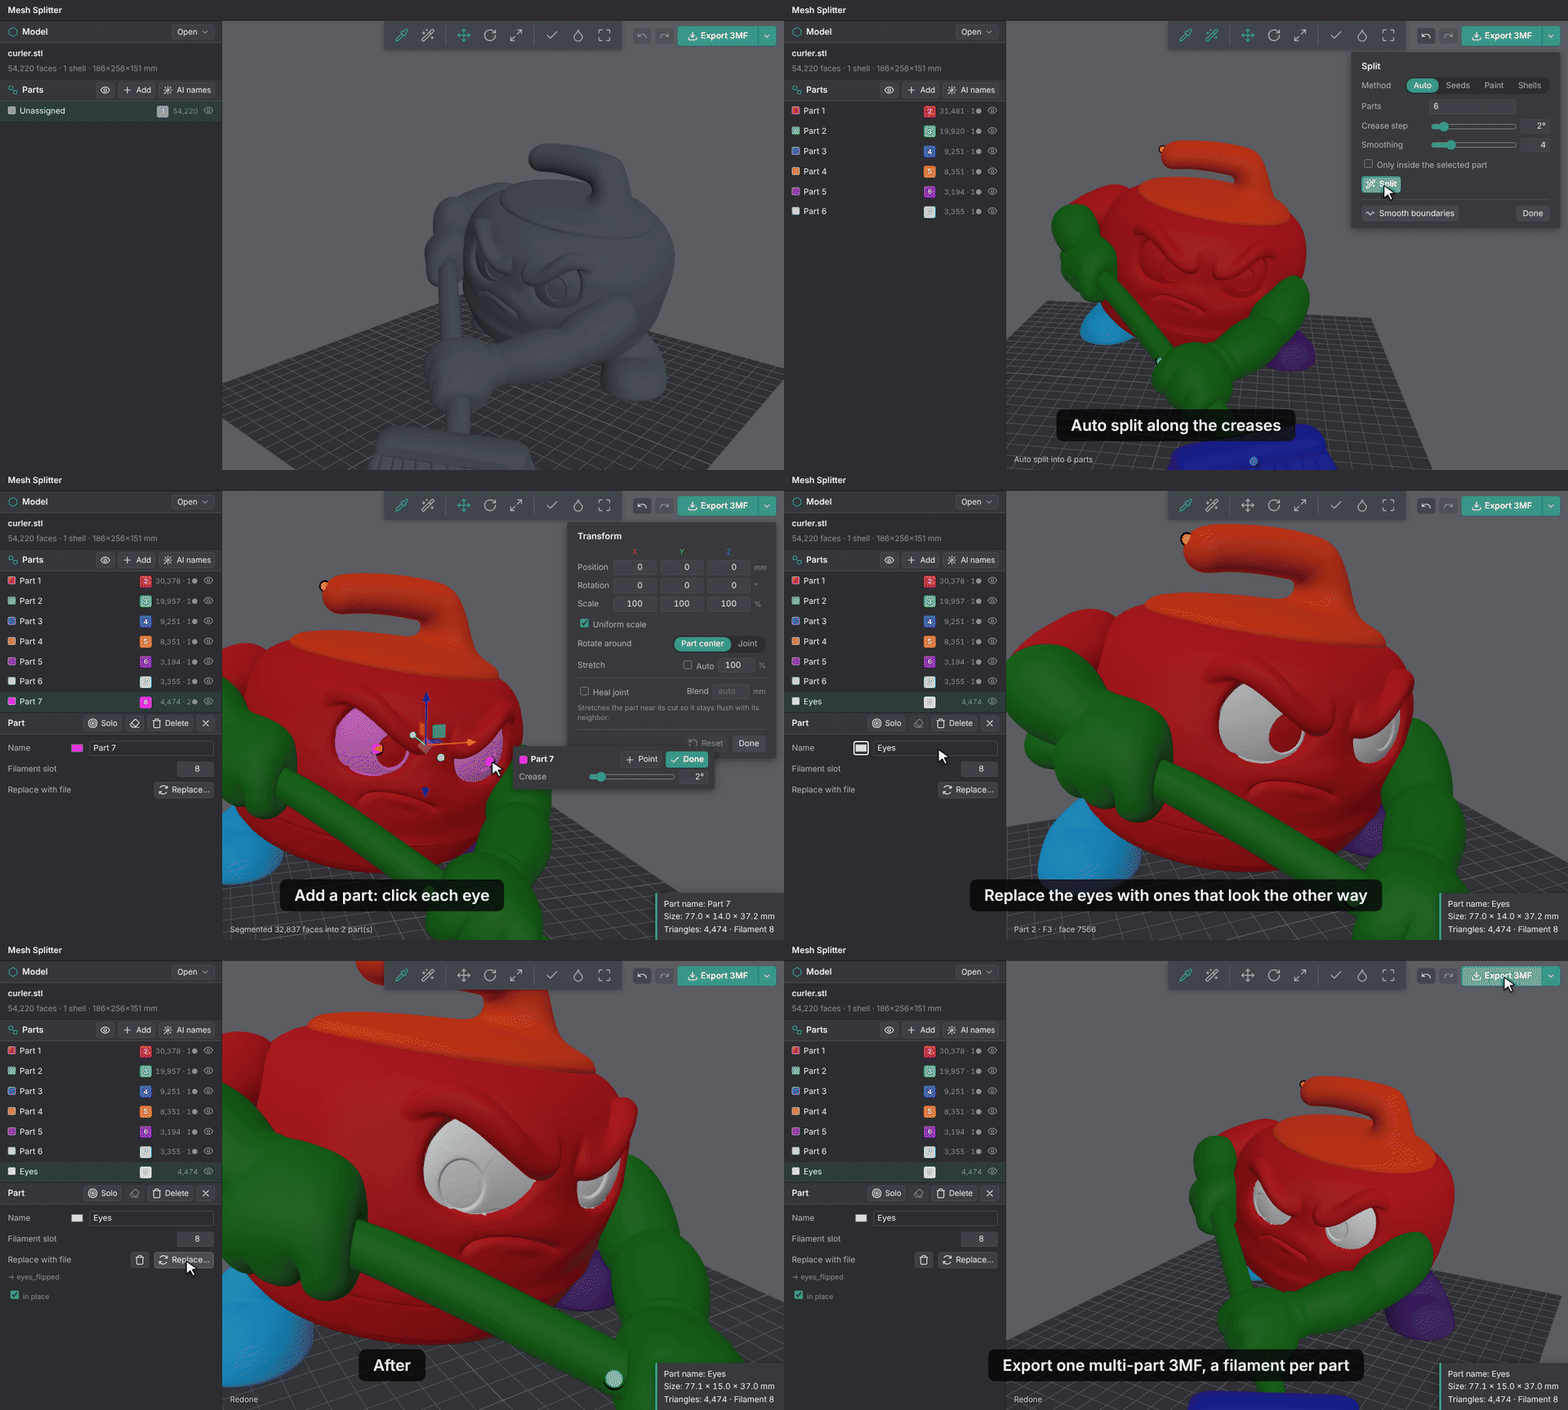
Split one solid mesh into separate, color-coded parts to edit it, color it, or print it in several filaments, right inside OrcaSlicer. Scale, rotate, or completely replace sections of the mesh for easy customization of single or multi-material prints. If you have ever been asked to print a part and customize "just this one thing," you may like this plugin.
For the example photo, I made the eyes 1 part, then replaced them with a flipped version to change where the figure looked. It also runs in any browser.
Guides
- Splitting: auto split, split by shells, seeds and Add part
- Editing parts: fill, brush, merge, Replace with…, show only, rename
- AI part naming: optional, opt-in part names and cut review
- Move, rotate, scale and heal: handles, snapping, undo, rotate on joint, heal joint, fill and anchor
- Exporting: Print as (one part, painted or parts), Send to Orca, part STLs, merged STL
- Command line: split and export from a script with
uv run mesh-splitter split - Claude Code plugin: ask Claude Code to split and export a model for you
- How it works: the splitting algorithm, the shared core, and the math behind joint transforms
Install in OrcaSlicer
- Download
mesh_splitter_any.whlfrom the latest release. - In OrcaSlicer 2.5, open Plugins, click the arrow next to Browse plugins, then Install local plugin and pick the file.
- Tick Activate and allow writing to Downloads. A Mesh Splitter tab appears next to Prepare / Preview.
The tab lists the objects on your plate, and a single object opens automatically. Print as picks how the result prints: as one part on its original filament (the default for a plain object), painted, or as separate parts on their own filaments. Send to Orca puts the split on the plate, next to the original. The arrow next to it can also replace the original or its plate, or fill the plate with copies. OrcaSlicer asks how to open it: pick Open as project.
Run in a browser
Open splitmesh.carrigg.dev. Nothing to install. Your model is split in your browser and is never uploaded.
To run it on your own computer instead, install uv, then run:
uv run mesh-splitter
It opens at http://127.0.0.1:8766/app/. Everything runs locally, and nothing is uploaded.
Controls
| Key | Action |
|---|---|
| W / E / R / Q | Move / rotate / scale handles, then hide them |
| J | Rotate on joint: one ring about the part's cut axis, pivoting at the cut's center |
| Shift (while dragging) | Snap to 1 mm, 15° or 5% |
| C | Toggle part colors / filament colors (follows Print as) |
| Home | Frame the model |
| Del | Delete the part (its faces join the neighbor) |
| Ctrl+Z / Ctrl+Y | Undo / redo |
| Right-click | Part actions: rename, show only, replace, … |
Credits
Source, issues and releases: github.com/d-carrigg/mesh-splitter. MIT license.
The figure in these docs is a model created with Meshy under the CC BY 4.0 License. The model is not included in the repo.