Move, rotate, scale and heal
Change a part's position, angle and size, and keep it joined to its neighbor.
- Move, rotate, scale and undo
- Rotate on joint
- Heal joint
- Fill and anchor
- Move along the plate or joint, and trim overlap
- Stretch
- Collision warning
Move, rotate, scale and undo
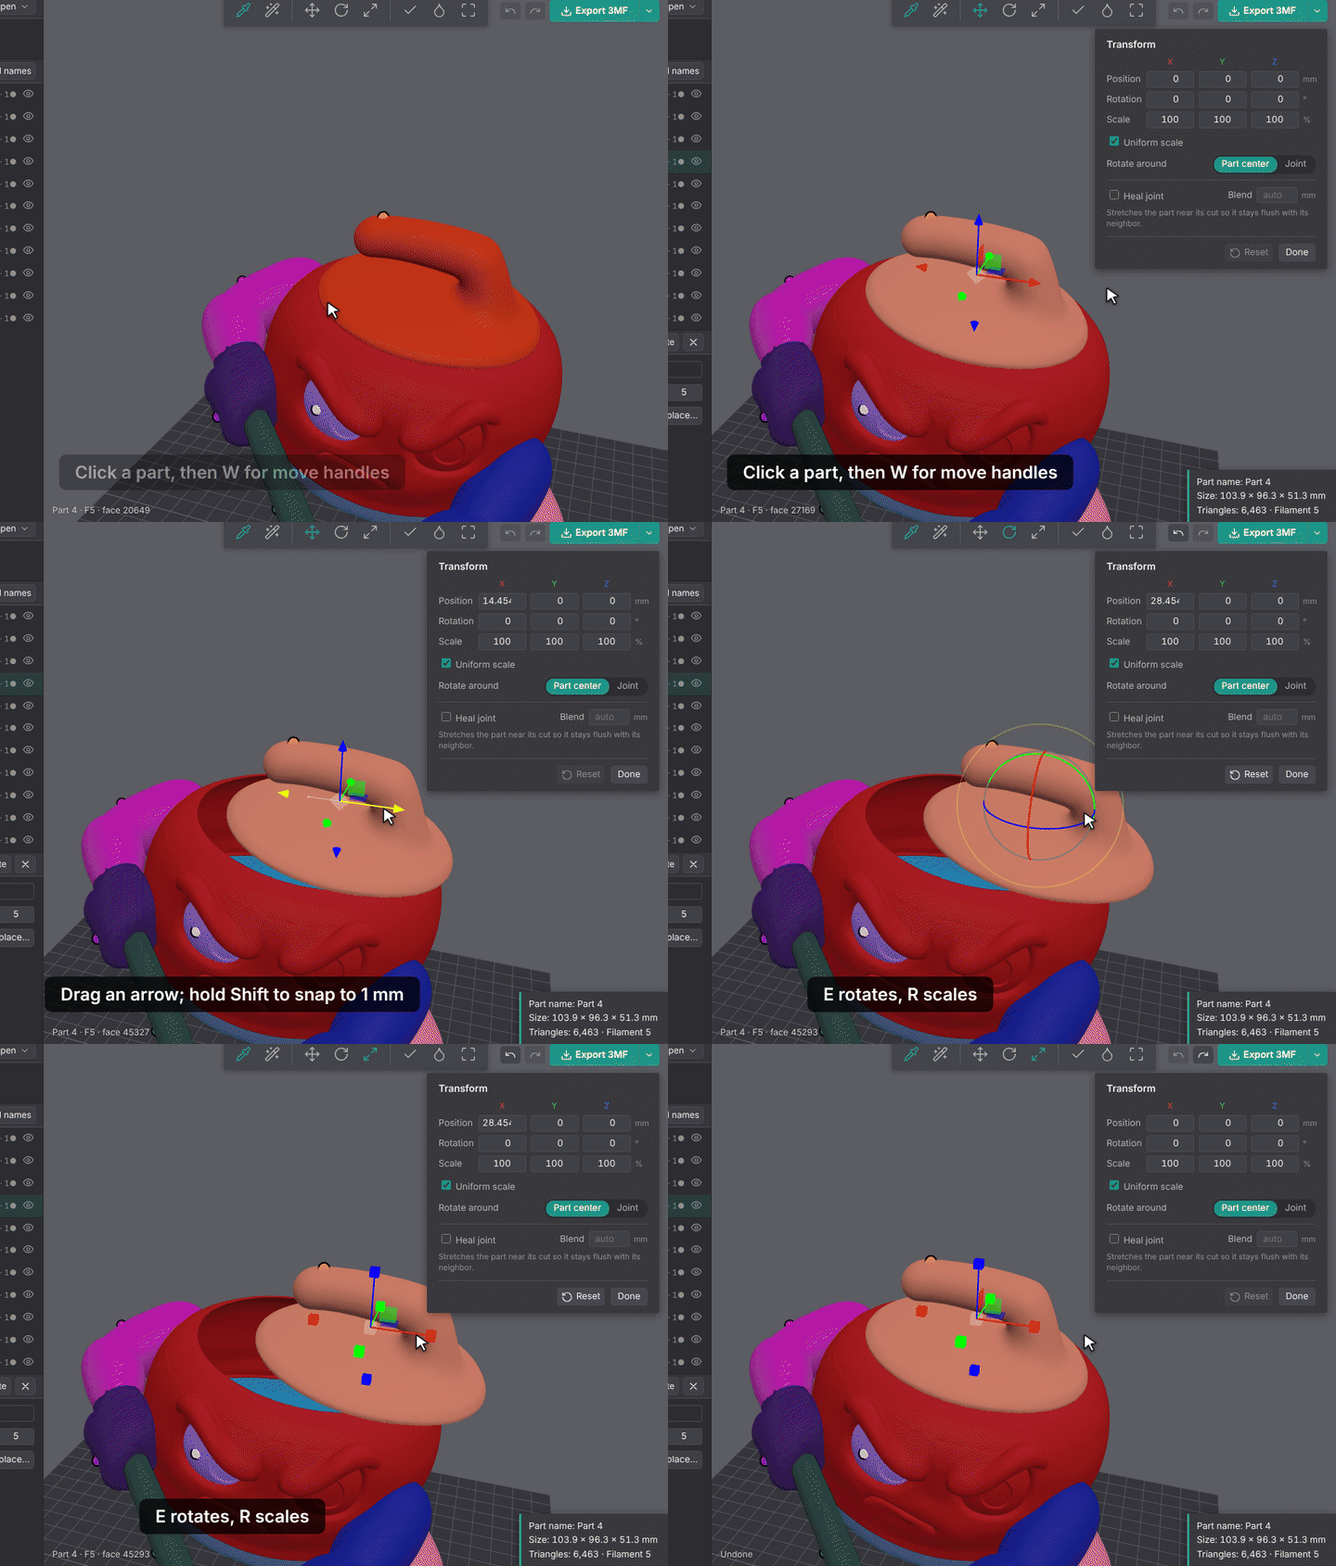
Each part can be moved, rotated and scaled on its own. The change shows in the view and is used by every export.
How to use it
- Click a part with the select tool (V).
- Press a key for handles in the view:
- W: move arrows. Shift snaps to 1 mm.
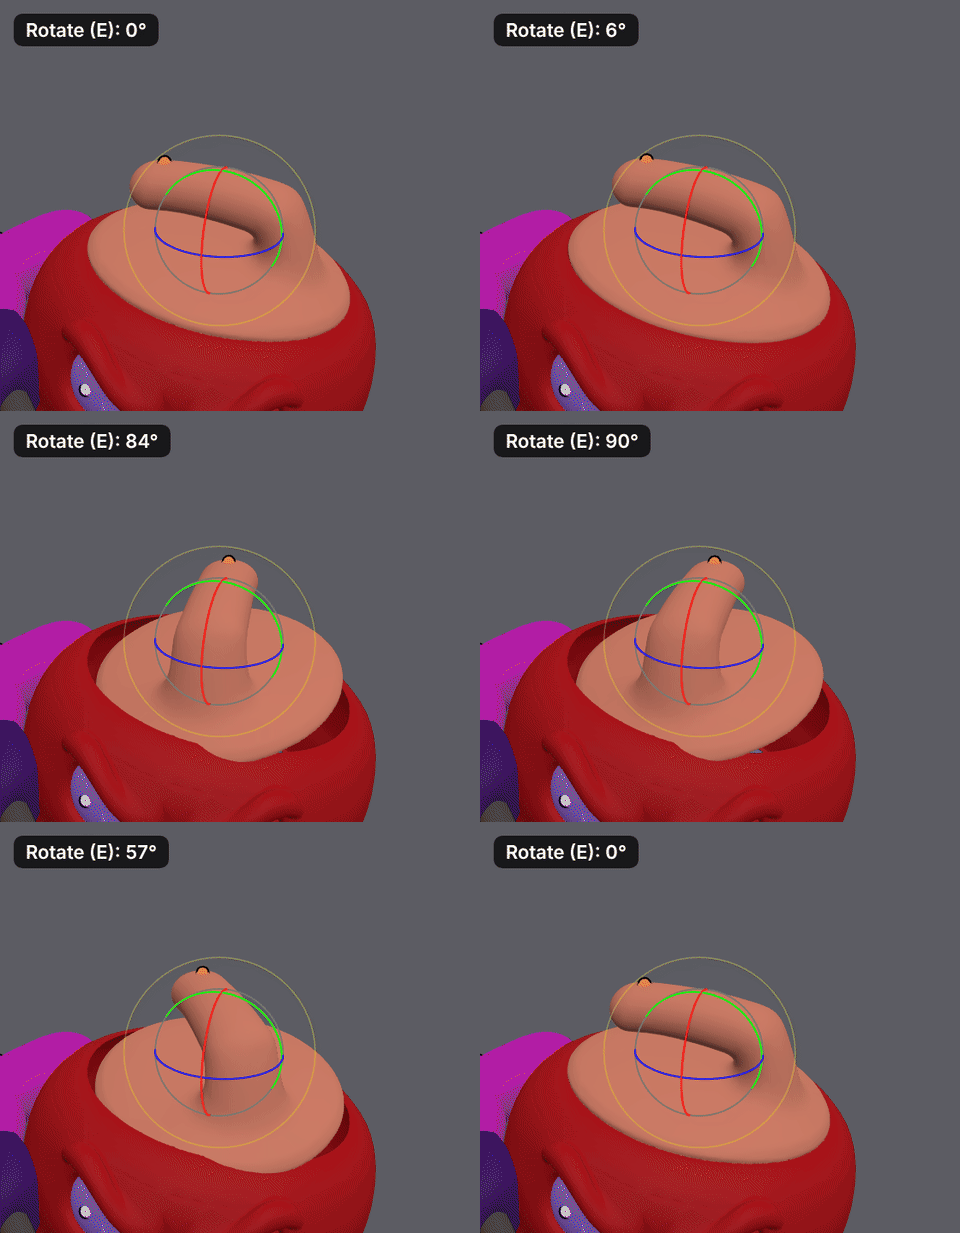
- E: rotate rings. Shift snaps to 15°.
- R: scale handles (corner box = all axes, arrow = one axis). Shift snaps to 5%.
- J: rotate on joint.
- Q: hide the handles.
- Or type values in the Transform panel that opens at the right of the view with the move / rotate / scale tools: position mm, rotation ° and scale % for X / Y / Z. Uniform scale scales all three axes together. Reset clears the part's transform and Done closes the panel.
Undo
Ctrl+Z undoes and Ctrl+Y redoes edits: transforms, splits, fills, merges and replacements. Each handle drag is one undo step. The undo and redo buttons are at the top right of the view.
Tips
- The pivot is the part's center (the joint's center for rotate on joint).
- After a move or rotate, a part can leave a gap at its cut. Heal joint closes it.
Rotate on joint
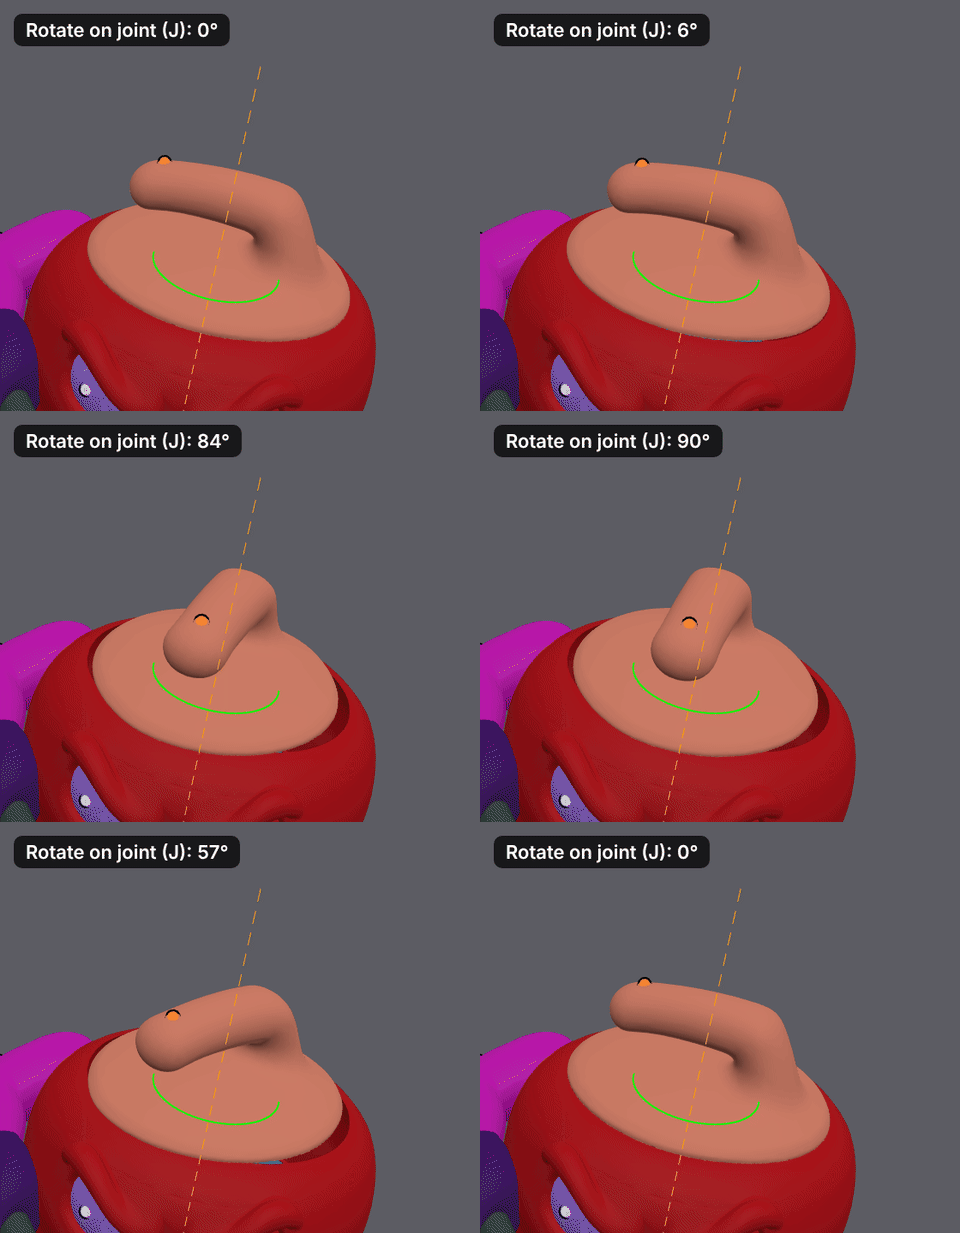
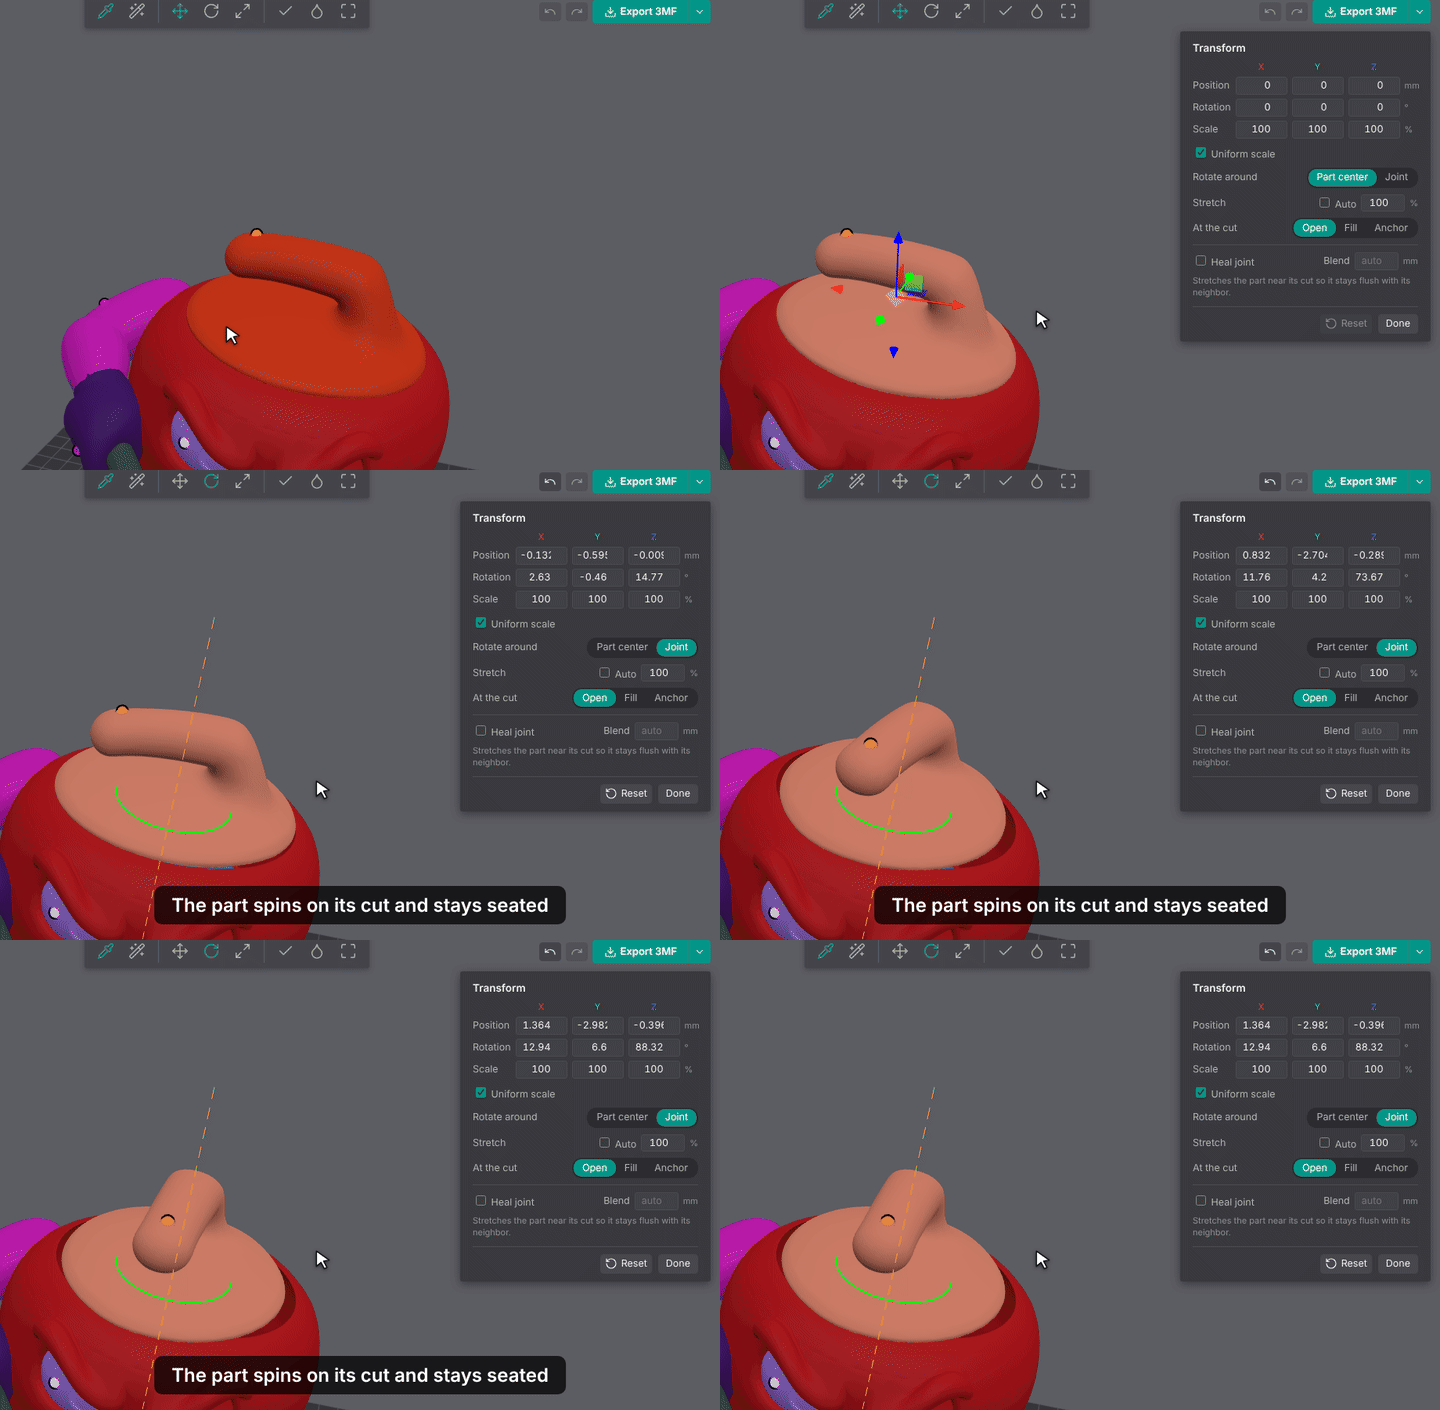
Spins a part about its cut instead of the world axes. The axis is the cut's normal and the pivot is the cut's center, so a part on an angled surface stays seated on the part it joins. Added in #23.
How to use it
- Select the part.
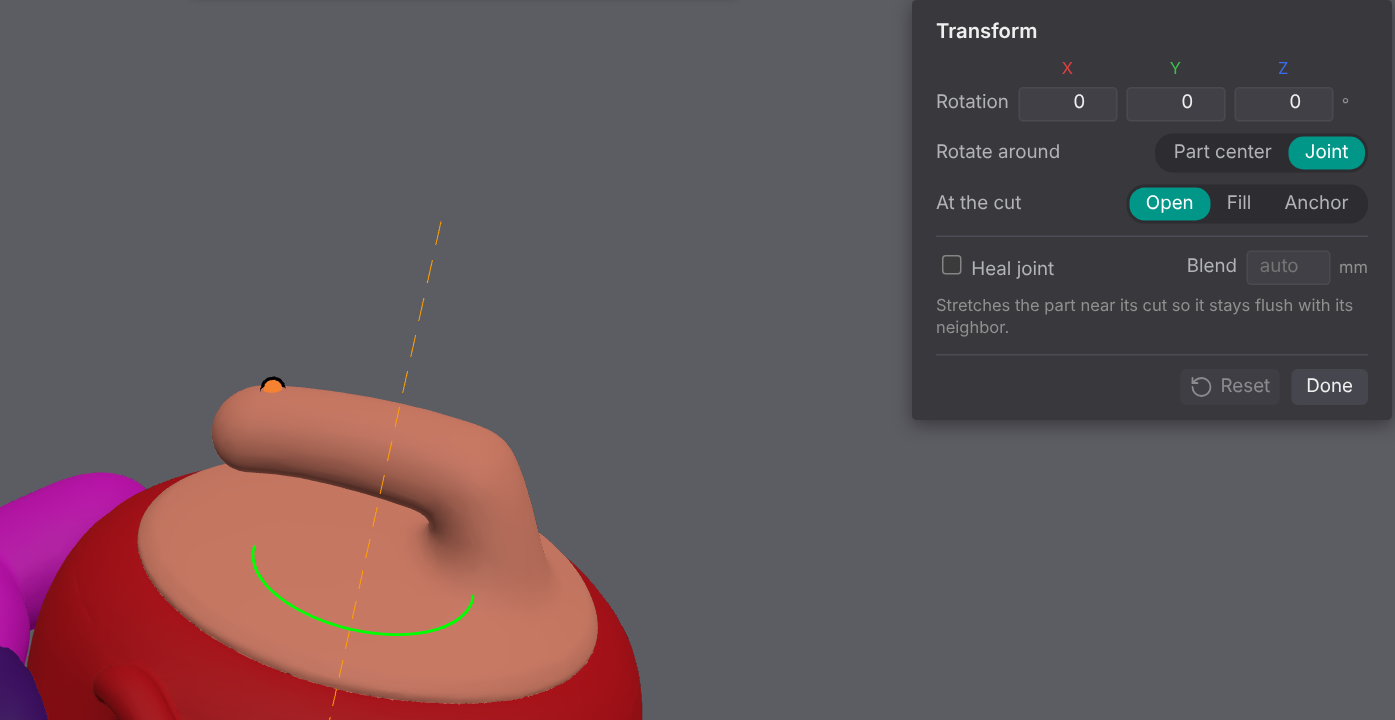
- Press J (or set Rotate around to Joint in the Transform panel). One ring appears, with a dashed line showing the joint's axis and the cut outlined in green.
- Drag the ring. Hold Shift to snap to 15°.
Tips
- A part with no cut (a separate shell) rotates on the world axes instead, and the status bar says so.
- A part with several cuts (an arm with a hand) turns on the cut toward the body: cuts to parts it carries, holds or reaches for are skipped, then the cut to the biggest neighbor that is bigger than the part wins (the shoulder, not the wrist).
- The rotation is stored as a normal rotation plus move, so its values stay editable in the Transform panel.
- If a rotated part still doesn't meet its neighbor exactly (an oval cut, for example), turn on heal joint.
Heal joint
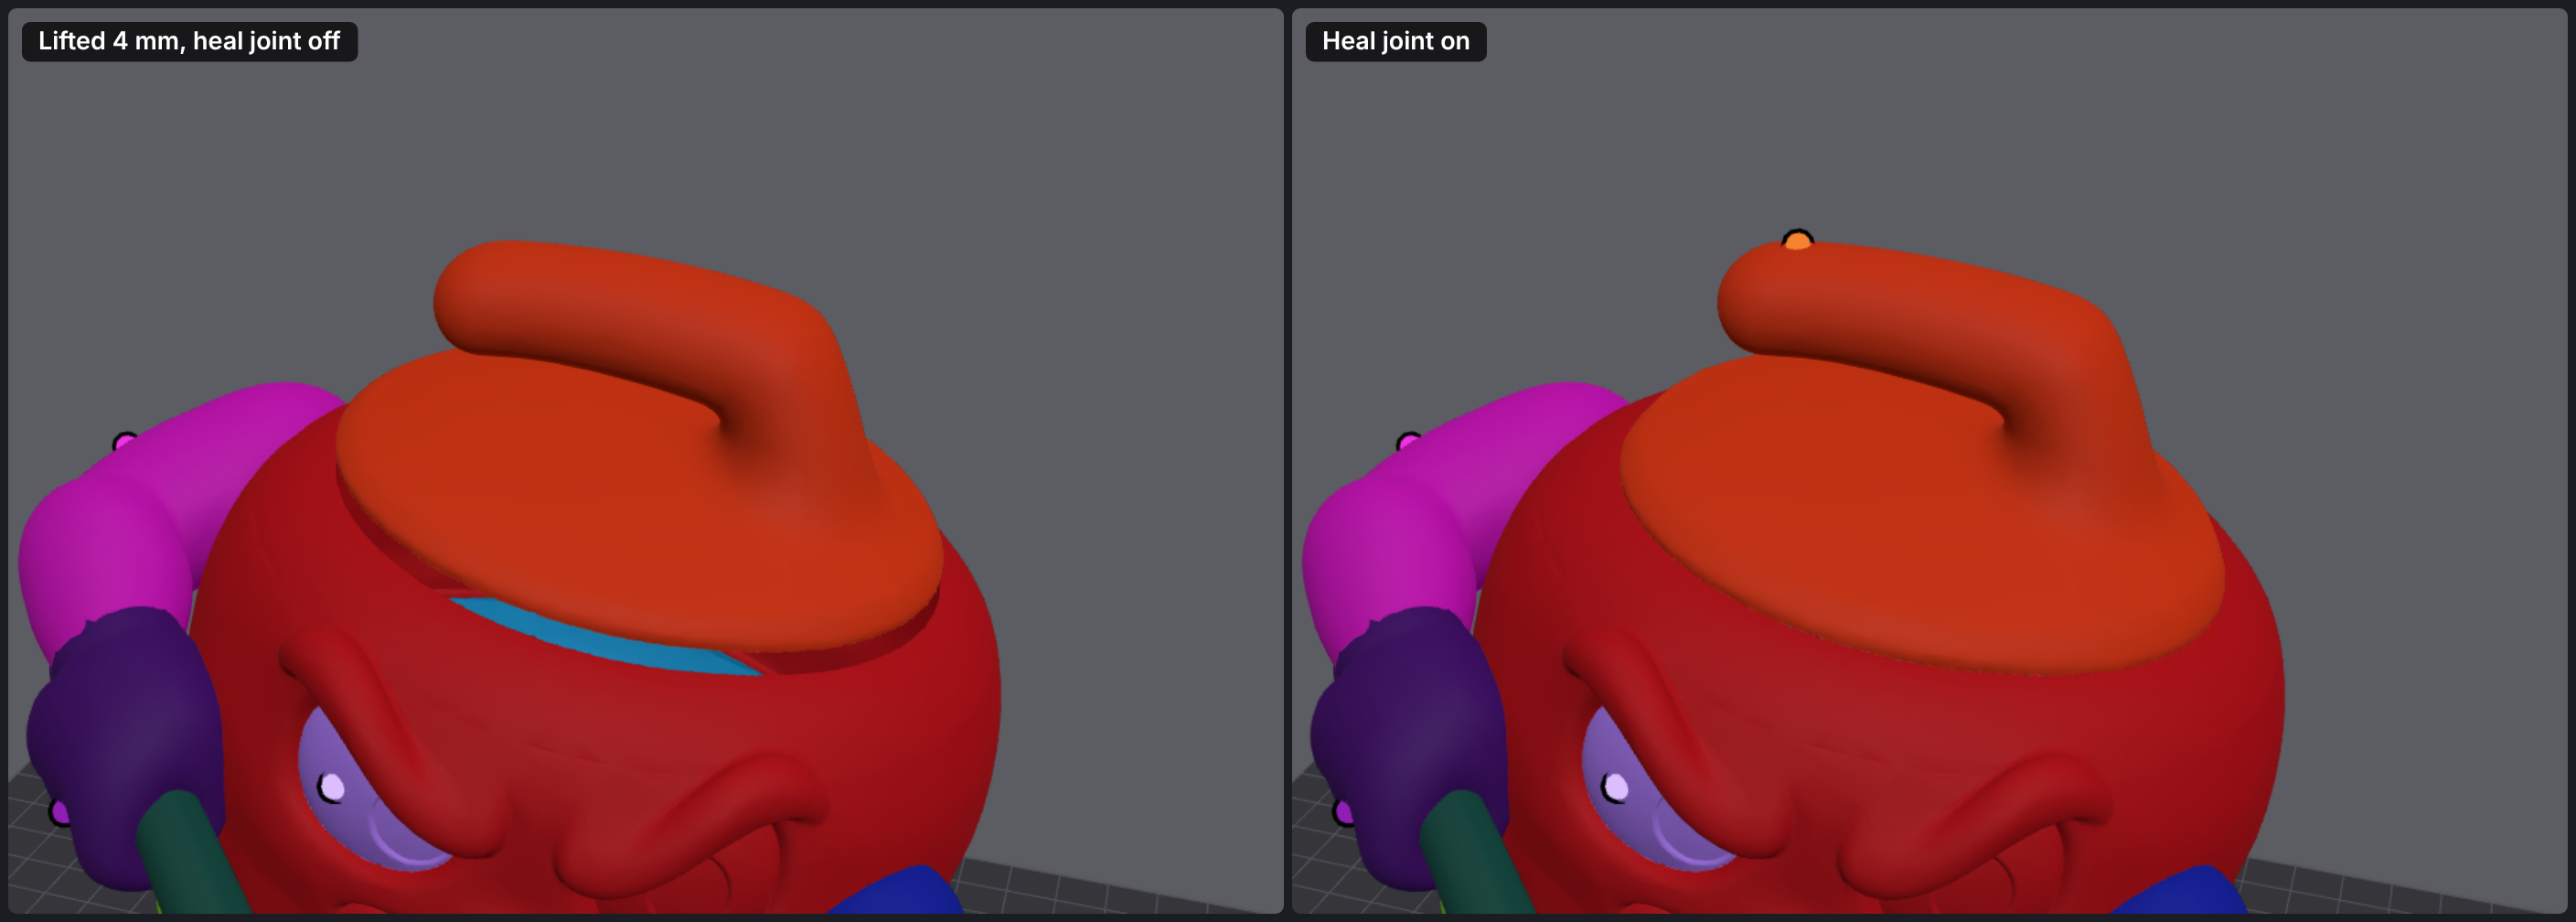
After you move or rotate a part, its cut edge may no longer line up with its neighbor, which leaves a gap or a step. Heal joint stretches or squeezes the part near its cut so the cut's edge lands back on the neighbor's edge. Added in #24.
How to use it
- Move or rotate a part (see transforms).
- In the Transform panel, tick Heal joint.
- Optionally set the mm blend: how far from the cut the shape may change. It starts at 20% of the cut's radius (1 to 15 mm); the rest of the part keeps its exact shape.
Tips
- The healed shape is used by Send to Orca, the multi-part 3MF and all STL exports, and it stays a closed solid.
- It works with any move or rotate. Rotate on joint plus heal joint is the usual pair for turning a part in place.
- Replaced parts can't be healed; the option hides for them.
- Undo turns it off like any other edit.
Fill and anchor
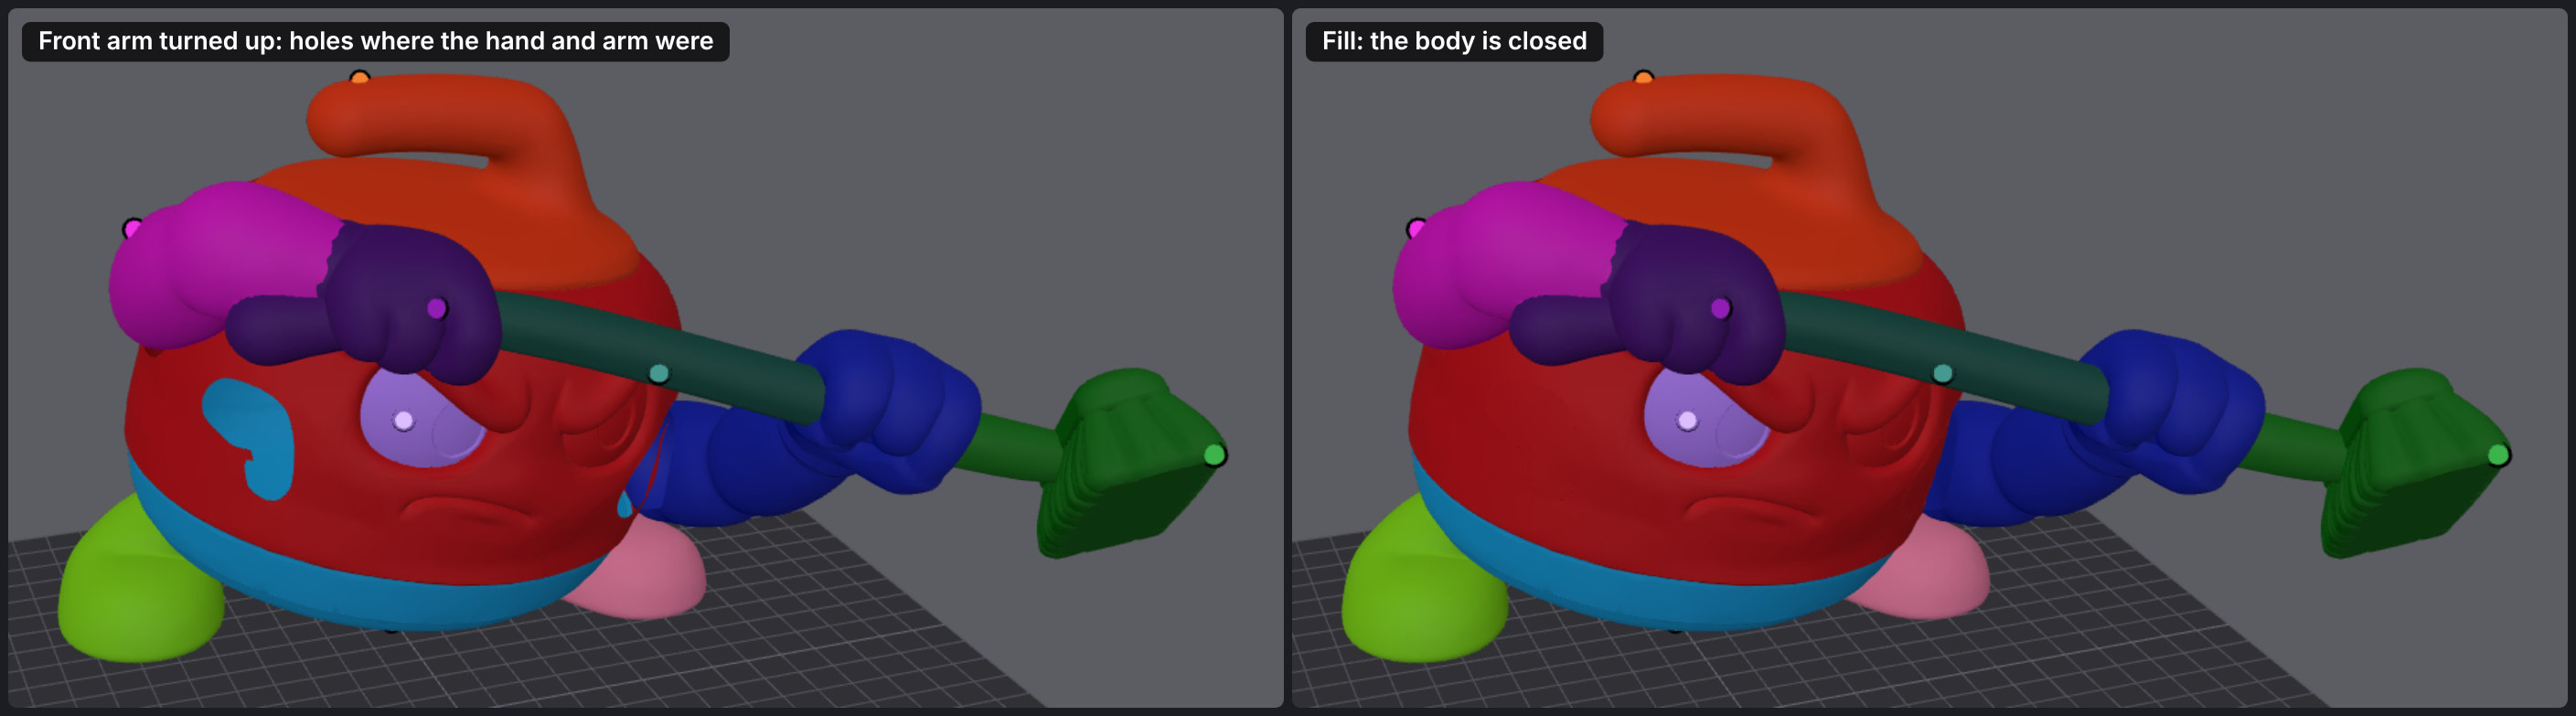
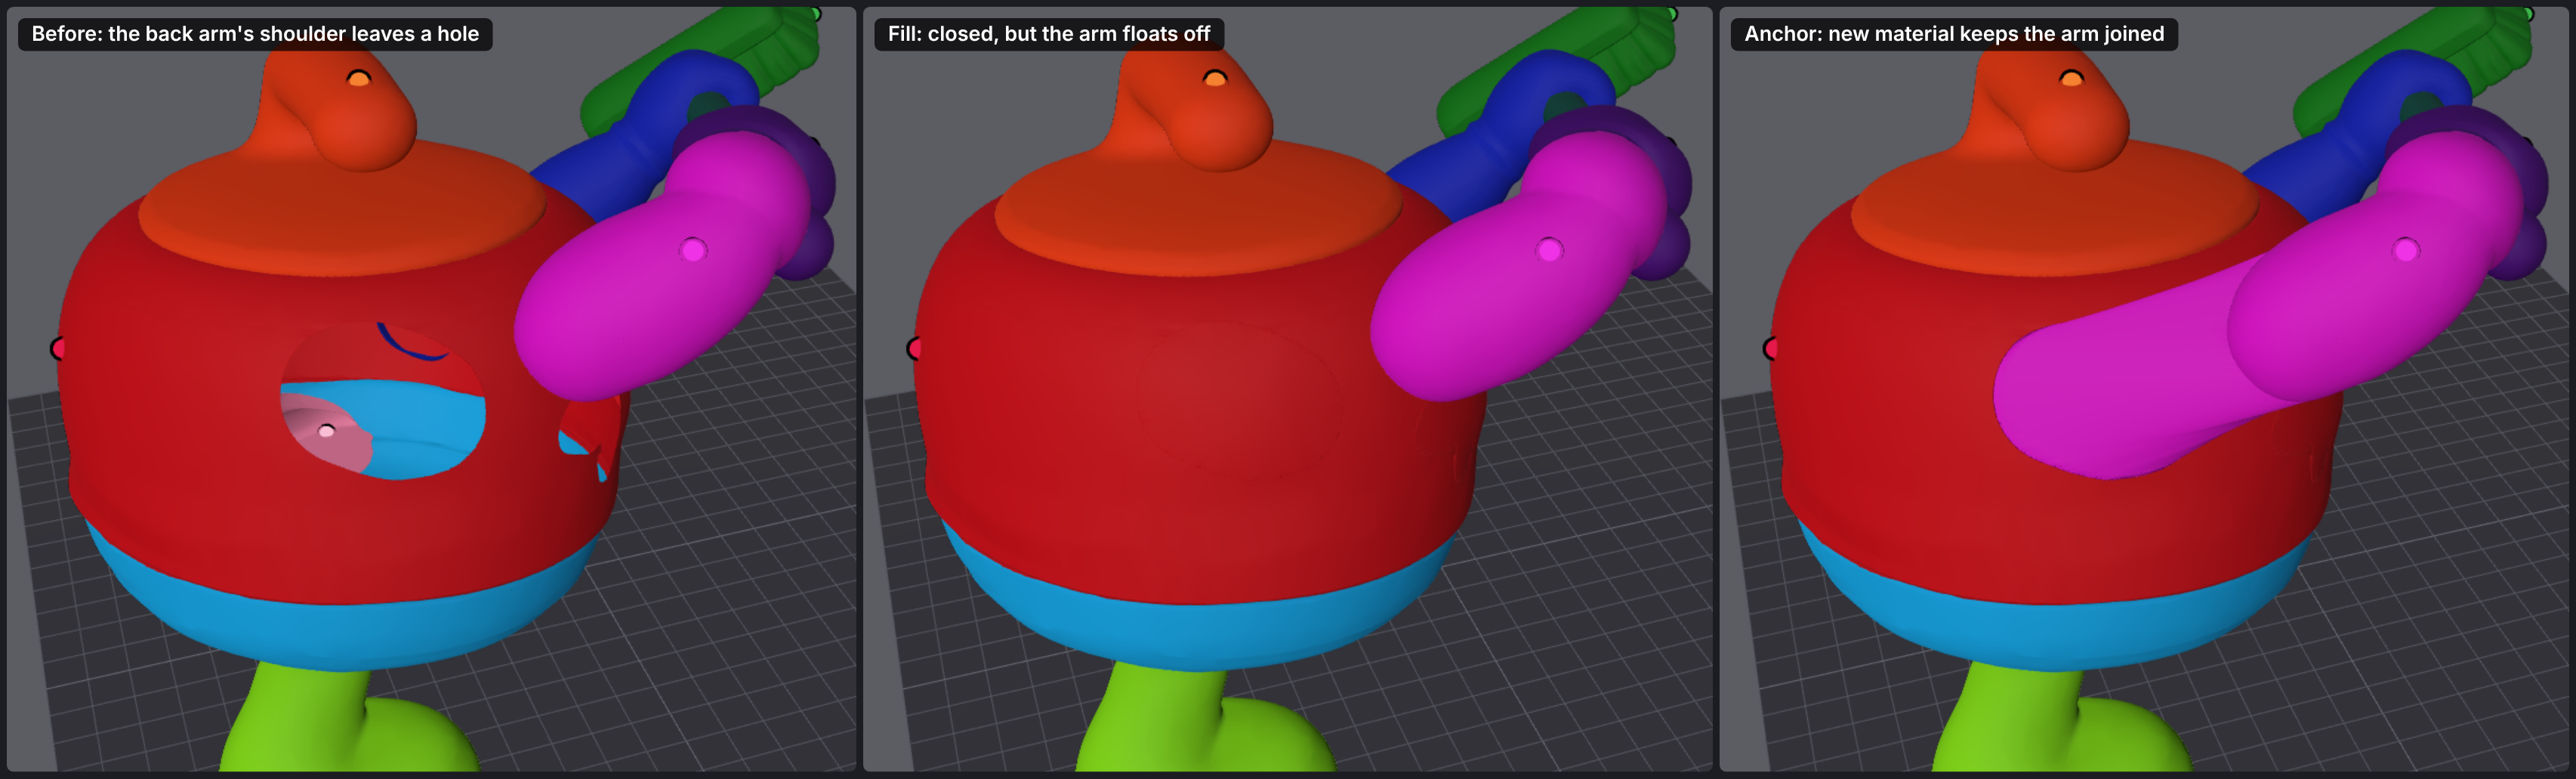
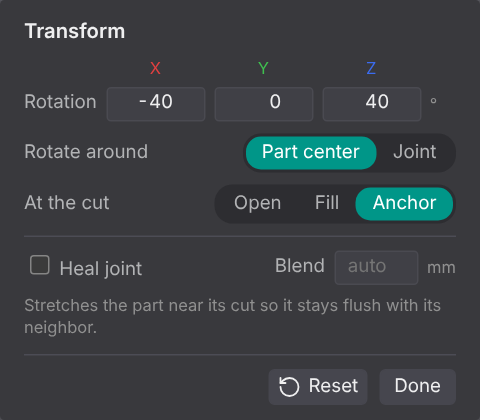
When a part moves away from the part it joined, the cut opens and both sides show a hole. By default the gap stays open; each part can choose otherwise, under At the cut in the Transform panel.
- Open (default): the gap shows, as cut. Exports close each side with a flat cap.
- Fill: the hole is patched. The bigger side (the body) gets a patch that follows its own curve, so the body stays smooth where a hand used to rest. The smaller side gets a flat face.
- Anchor: the part stays joined where it attaches. New material sweeps from the neighbor's rim to the part's moved cut, along the same turn, so an arm raised at the shoulder stays on the body instead of lifting off.
How to use it
- Select the part (Ctrl+click to select more).
- Open the Transform panel (move, rotate or scale in the toolbar).
- Under At the cut, pick Open, Fill or Anchor. It applies to every selected part.
Tips
- Patches and new material show in the view as soon as a part moves, and Send to Orca, the multi-part 3MF and all STL exports use them. Every part stays a closed solid.
- Parts that move together (Move with, Hold, Reach) don't open a gap, so nothing is added between them.
- Anchor works best with rotate on joint or a turn about the shoulder. Heal joint is the other way to close a small gap: it bends the part back onto its neighbor instead of adding material.
- Replaced parts always use Fill.
Move along the plate or joint, and trim overlap
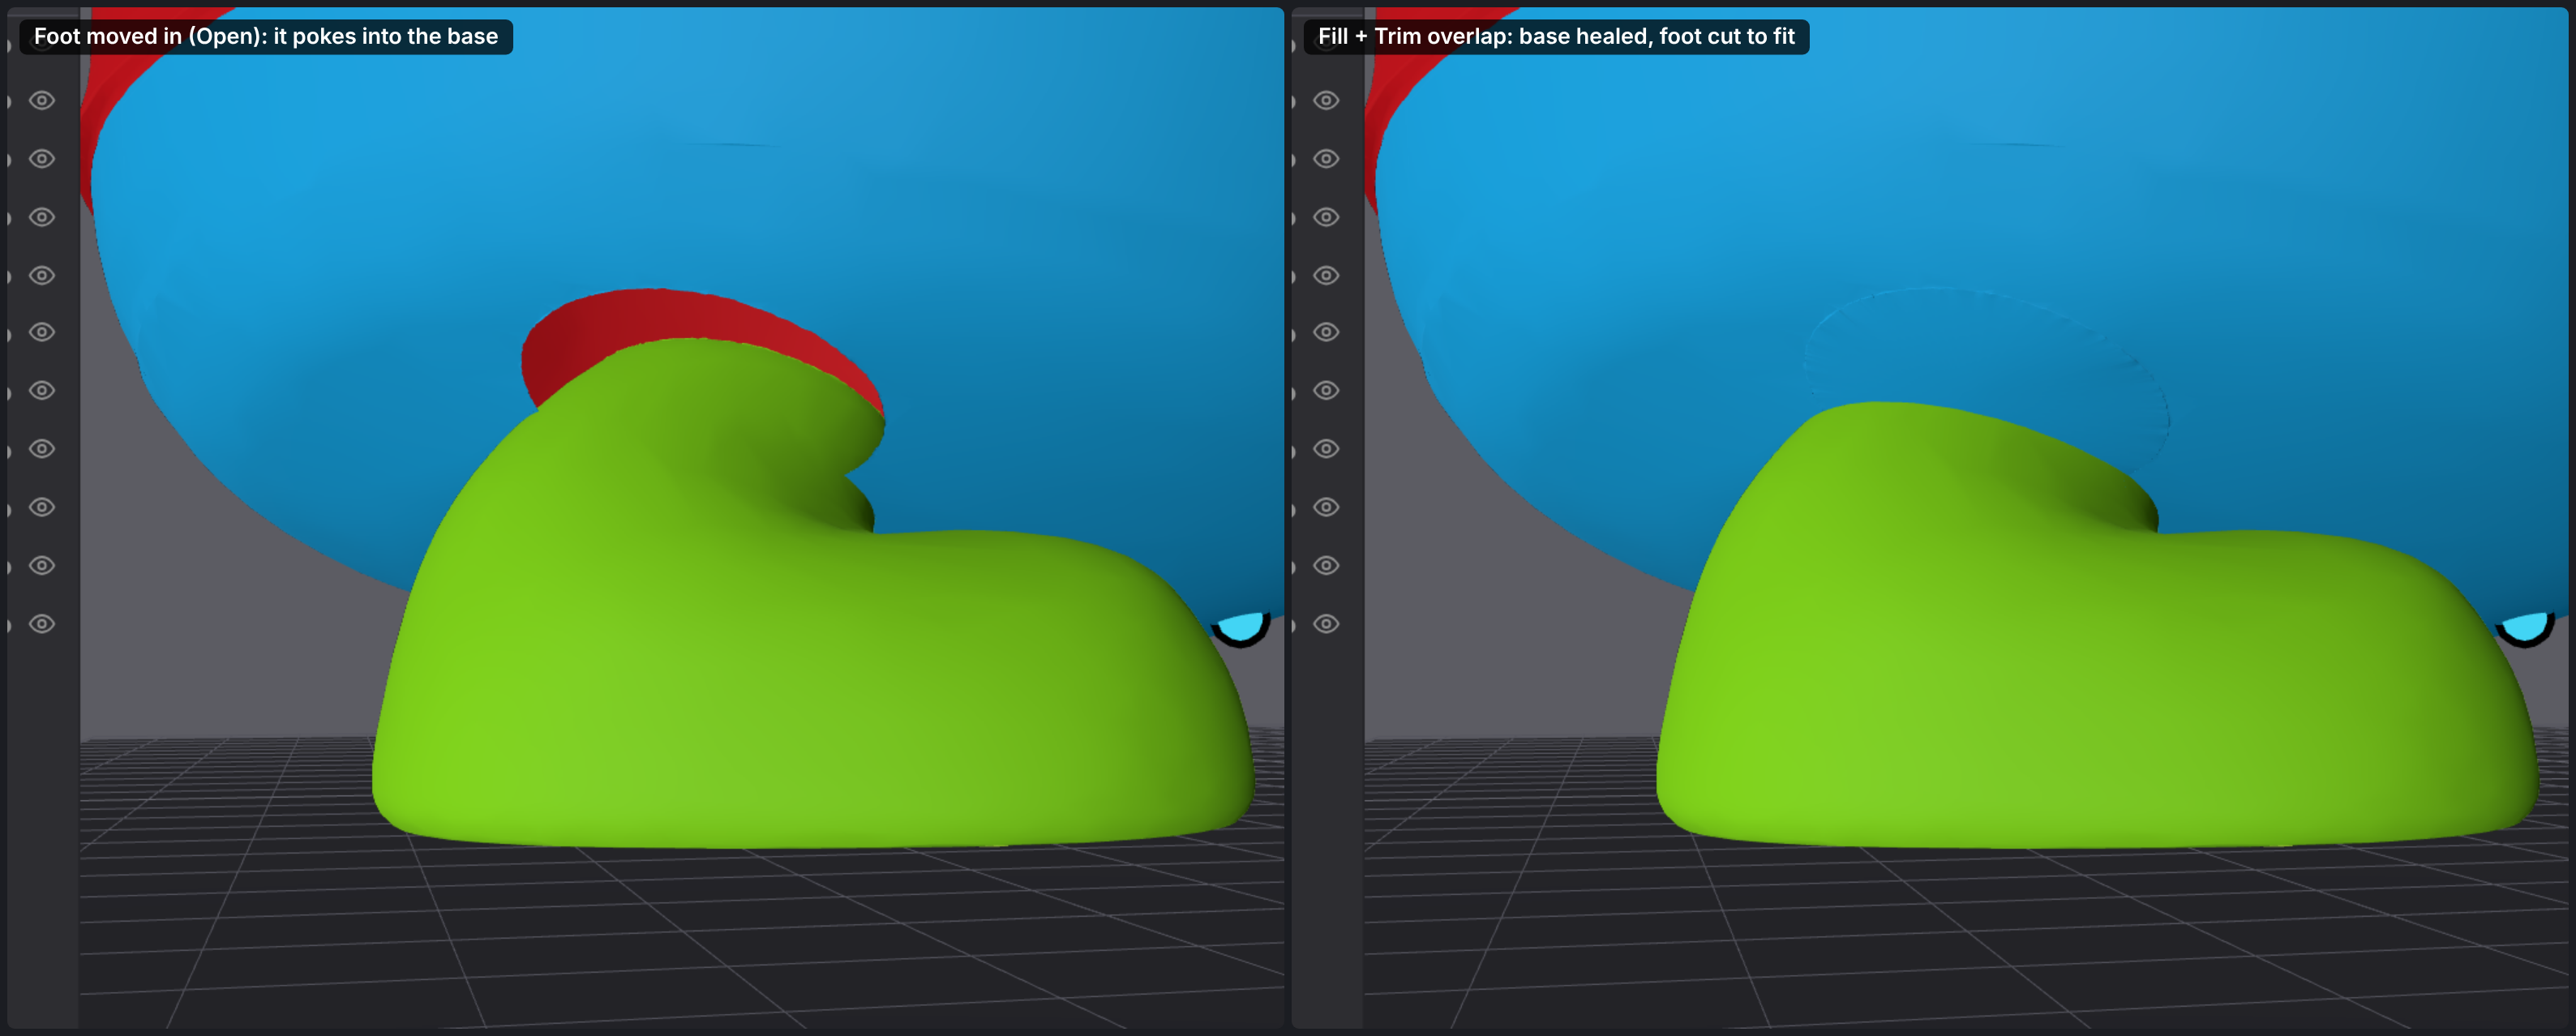
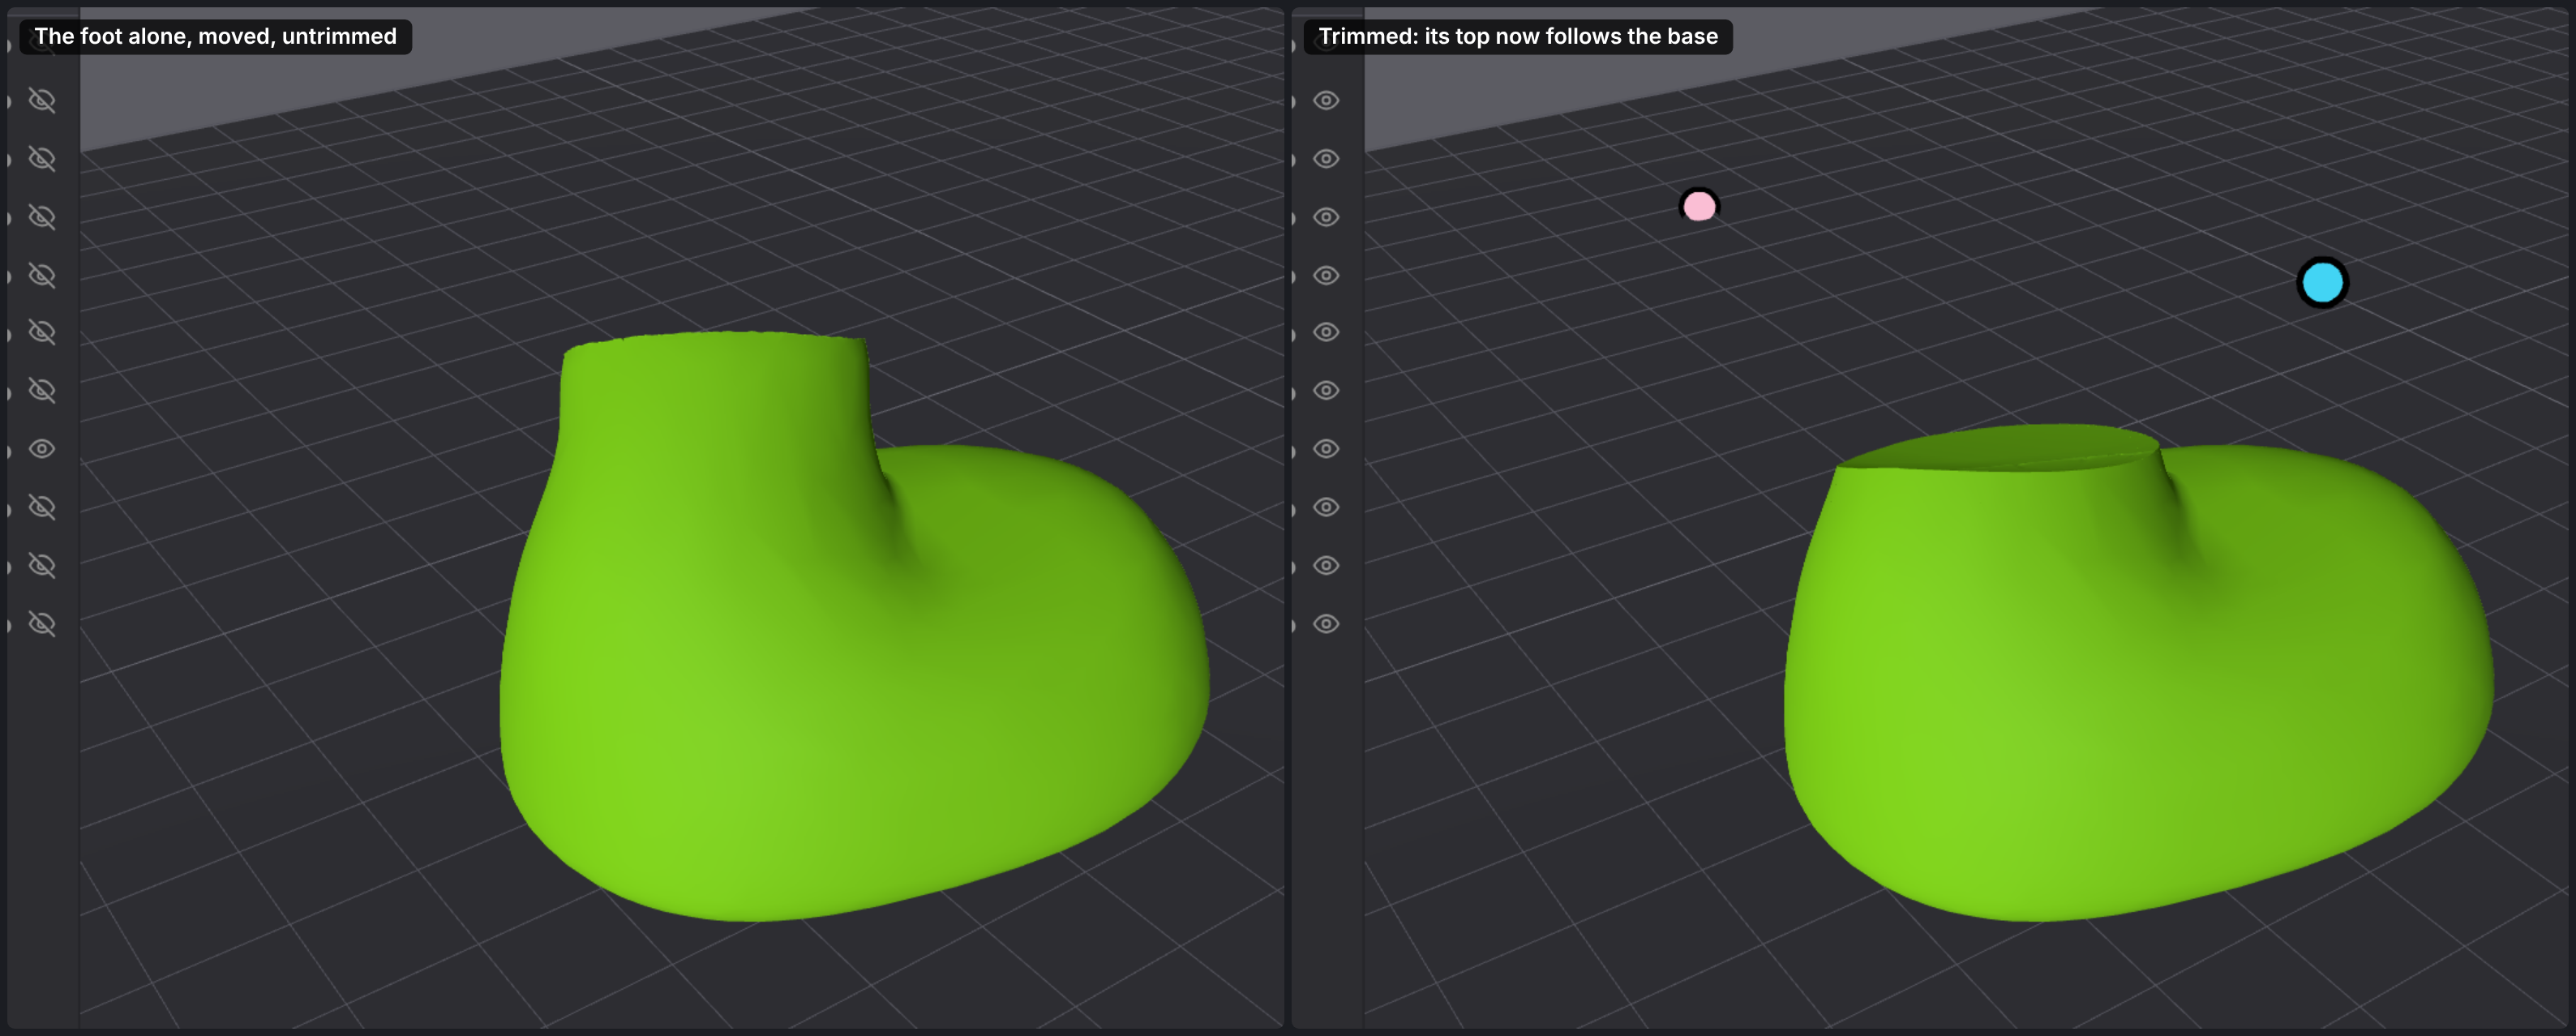
Slide a part along the plate or along the part it joins, and cut off whatever ends up inside other parts. For example, a foot slid in under the body stays on the plate, the body's base closes where the foot was, and the foot loses the bit that would poke into the base.
How to use it
- Select the part and press W for the move handles.
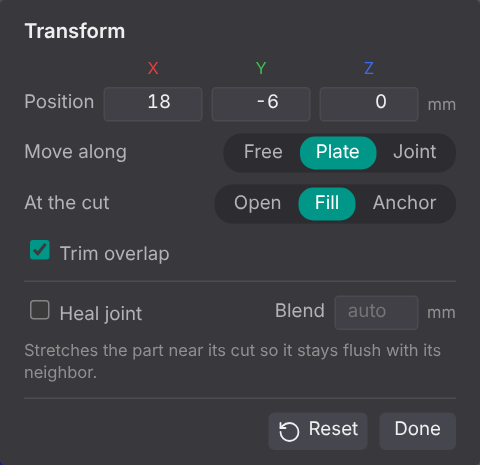
- In the Transform panel, set Move along:
- Free: X, Y and Z (the default).
- Plate: X and Y only, so the part keeps its height on the plate.
- Joint: the two directions in the plane of the part's cut, so it slides along the part it joins.
- Set At the cut to Fill to close the hole the part leaves in its neighbor (see Fill and anchor).
- Tick Trim overlap. After a move or rotate, the part is cut where it overlaps other parts.
Tips
- Trim only changes the part it's on. The other parts keep their shape, and a Fill patch on the neighbor counts as its surface, so the trimmed part fits against it.
- The trimmed shape is used by Send to Orca, the multi-part 3MF and all STL exports, and it stays a closed solid.
- While you drag, the part shows untrimmed; the trim updates when you stop.
- Trim overlap applies to all selected parts. Replaced parts can't be trimmed.
Stretch
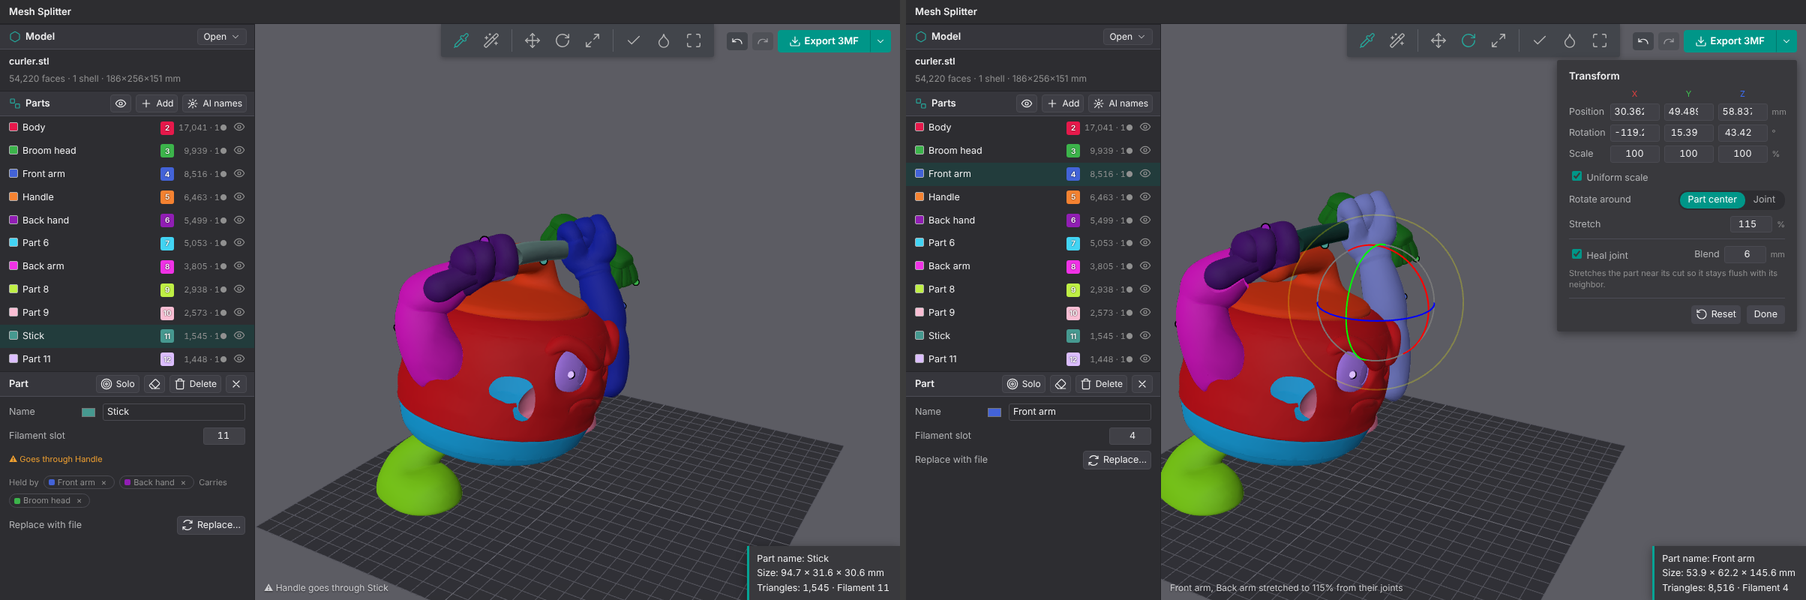
Lengthens (over 100%) or shortens a part along its own length, from its joint with the rest. Use it to lengthen raised arms so the broom they hold clears the stone's handle.
How to use it
- Select the part (Ctrl+click to select more, e.g. both arms).
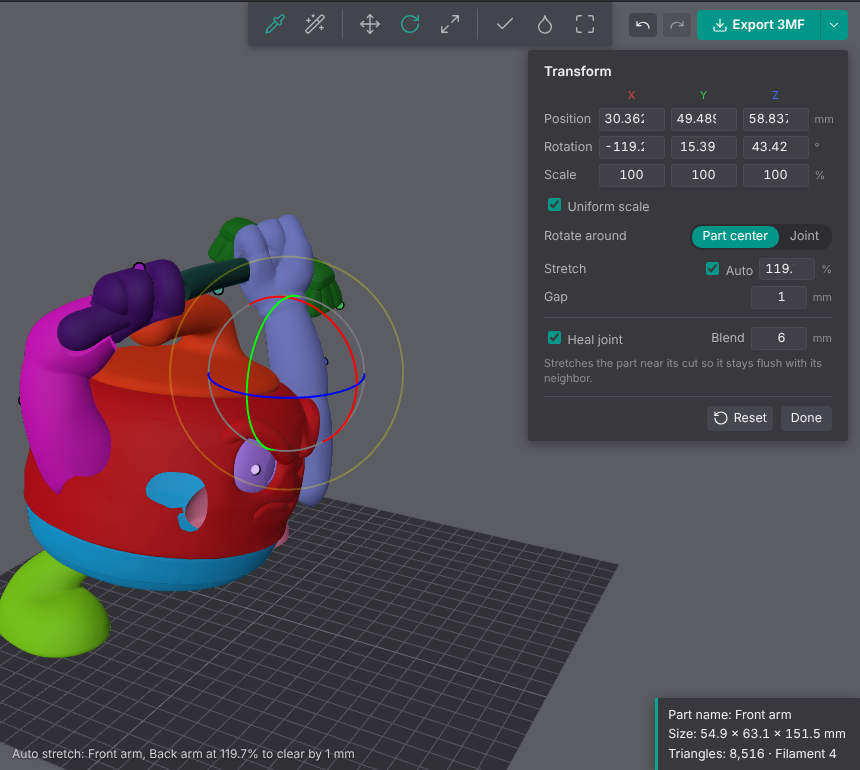
- Press R (or click scale in the toolbar) and type a Stretch % in the Transform panel. It applies to every selected part. 100 turns it off.
Auto stretch
Tick Auto next to the stretch % to let it pick the amount: the smallest stretch (the same for every selected part, so both arms match) that keeps what the parts hold or carry at least Gap mm (default 1 mm) from every other part. It re-solves whenever you move, rotate or relink parts. Typing a % turns Auto off. If no stretch up to 300% clears it, the parts stay at 100% and the status bar says so. Reset turns Auto off.
Tips
- The joint stays put, so heal joint keeps it seated.
- Parts that move with it move out with its end without stretching, and a part it holds re-solves onto the new grips.
- It works on top of move, rotate and rotate on joint. Reset clears it.
Collision warning
After a transform, a part that passes through another part it didn't touch before (the broom stick through the handle) shows ⚠ Goes through … in its Part section, in the status bar and in Check. Parts that share a cut are skipped, since they always touch there.